
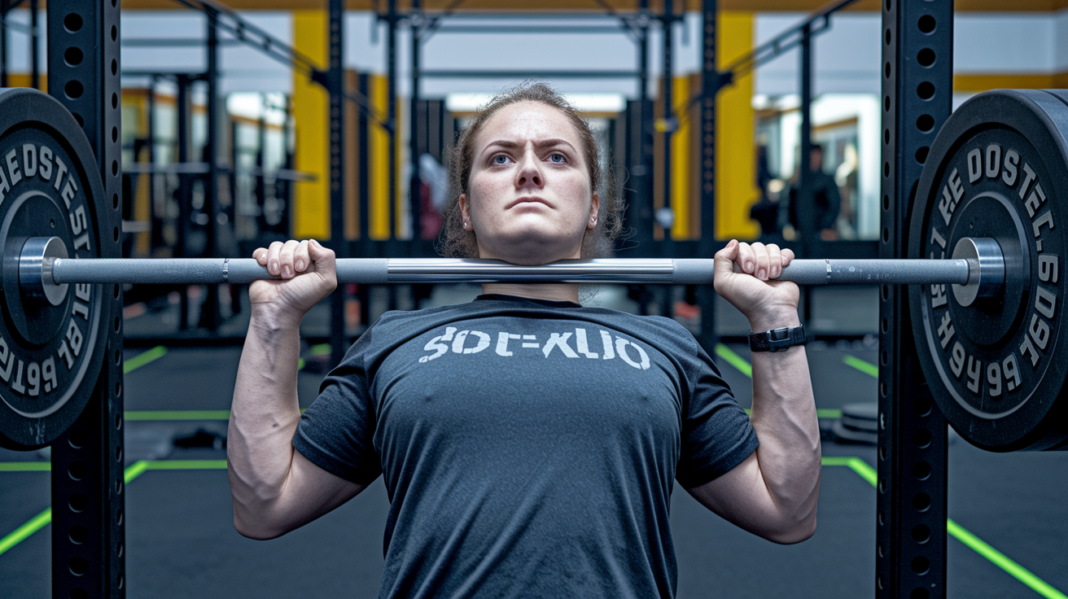
You don’t need to live in the gym to build serious muscle.
A smart 4-day push/pull split gets you bigger and stronger by hitting each muscle twice a week while leaving time to recover.
Start sessions with heavy compound lifts, then finish with higher-rep accessory work to add size and shore up weak points.
This routine gives a simple, time-efficient plan that balances strength, volume, and recovery so growth actually happens.
Complete Weekly Layout for a 4‑Day Push/Pull Workout Split
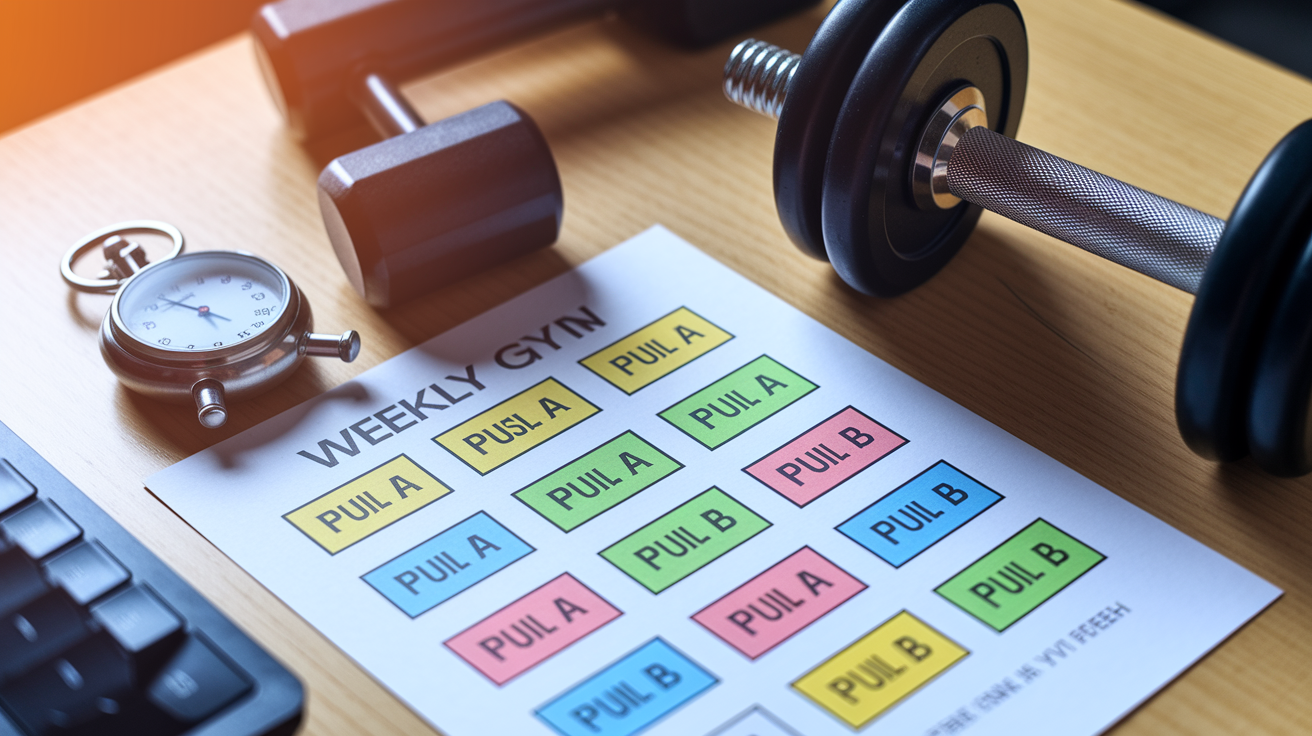
A 4-day push/pull split means you’re training four times each week, switching between “push” workouts and “pull” workouts. The typical pattern looks like this: Push A on Monday, Pull A on Tuesday, Push B on Thursday, Pull B on Friday. You’re hitting each major muscle group twice per week without training the same movements back to back. Recovery stays solid between similar exercises while you keep weekly training frequency high.
Each session runs 60 to 90 minutes. Simple rule: start with the heaviest compound lifts when you’re fresh (bench press, rows, overhead press), then finish with lighter isolation moves (lateral raises, curls, triceps work). Because you’re hitting muscles twice per week instead of once, you’re creating a stronger growth signal without needing marathon gym sessions. The back to back push/pull structure also spreads fatigue evenly across your joints.
Two sample weekly schedules:
- Option A (classic mid-week rest): Monday = Push A, Tuesday = Pull A, Wednesday = off, Thursday = Push B, Friday = Pull B, Saturday and Sunday = off.
- Option B (maximum spacing): Monday = Push A, Tuesday = off, Wednesday = Pull A, Thursday = off, Friday = Push B, Saturday = Pull B, Sunday = off.
- Option C (busy schedule): Tuesday = Push A, Thursday = Pull A, Saturday = Push B, Sunday = Pull B, all other days off.
- Option D (weekend warrior): Friday = Push A, Saturday = Pull A, Sunday = off, Monday = Push B, Tuesday = Pull B, rest of week off.
Aim for at least one full rest day between any two consecutive sessions. If your lower back or shoulders are feeling beat up mid-week, shift to Option B or C to add recovery time. Balance push and pull volume carefully. If your pressing numbers climb faster than your rowing numbers, rear delt and rotator cuff issues can creep in.
Defining Push and Pull Muscle Groups for This Routine
Push muscles are anything that extends or presses away from your body. On a push day you’re training chest (pectorals), shoulders (anterior and lateral deltoids), triceps, and quads. Main motions are bench pressing, overhead pressing, dips, and leg extensions or squats. These muscles work together in any movement where you’re driving a load away.
Pull muscles are what bring weight toward you or hinge your body. On pull days you hit back muscles (lats, traps, rhomboids), rear deltoids, biceps, and hamstrings. Key patterns are rows (horizontal pulling), pull-ups or pulldowns (vertical pulling), deadlifts or hip hinges, and biceps curls. Your posterior chain does most of the work here.
Six primary muscle-group assignments:
- Chest – Push (bench press, flyes, dips).
- Shoulders (front and side delts) – Push (overhead press, lateral raises).
- Triceps – Push (pushdowns, dips, overhead extensions).
- Lats and upper back – Pull (rows, pulldowns, pull-ups).
- Rear delts – Pull (face pulls, rear delt flyes).
- Biceps and hamstrings – Pull (curls, RDLs, leg curls).
Push Day A: Heavy Compound Strength Session

Push Day A is built around strength work. You’re lifting in the 6 to 8 rep range on the main compound movements (barbell bench press and overhead press) so you can add weight week to week and build both muscle and pressing power. The goal is to push relatively heavy loads with perfect form while staying a rep or two short of failure. After the big lifts you’ll add a few sets of incline pressing to develop the upper chest and one or two accessory moves for shoulders and triceps.
Always do compound lifts first because they demand the most focus and full-body tension. If you try to do lateral raises before bench pressing, your shoulders will be fatigued and your pressing numbers drop. Stick to the order below, rest appropriately, and save energy for the heavy sets. Use a controlled tempo on the way down (two seconds) and an explosive push on the way up.
| Exercise | Sets | Reps | Rest |
|---|---|---|---|
| Barbell Bench Press | 4 | 6–8 | 120–180 sec |
| Overhead Press (Barbell or Dumbbell) | 4 | 6–8 | 120 sec |
| Incline Dumbbell Press | 3 | 8–12 | 90 sec |
| Dumbbell Lateral Raise | 3 | 12–15 | 45–60 sec |
| Triceps Dips or Cable Pushdown | 3 | 8–12 | 60–90 sec |
Keep your shoulder blades pulled down and back (scapular retraction) on all pressing. Don’t let your elbows flare past 45 degrees on bench or you’ll shift stress to the shoulder joint instead of the chest. Brace your core on overhead presses to protect your lower back. A 2-0-1-0 tempo (two seconds down, no pause at the bottom, one second up, no pause at the top) works for most sets. On the final set of bench or overhead press, you can slow the eccentric to three seconds to squeeze extra growth stimulus.
Pull Day A: Vertical Pulling and Power Development

Pull Day A emphasizes vertical pulling (pull-ups or lat pulldowns) paired with heavy horizontal rows. The goal is to build back width and thickness using compound patterns at moderately heavy loads. You’ll work in the 6 to 10 rep range for the main lifts, then finish with face pulls to hit rear delts and a set of curls for biceps. This session balances all the pressing volume from Push Day A and protects shoulder health.
Vertical pulls (pull-ups or lat pulldowns) target your lats and upper back. Heavy barbell rows or T-bar rows build the mid-back and improve pulling strength for deadlifts. Face pulls counteract forward shoulder posture from benching, and hammer curls add arm work without overstressing the elbow joint. Together these four movements create a full back-development stimulus in about 70 minutes.
Four key technique reminders for Pull Day A:
- Lat engagement – Initiate every pull by driving your elbows down and back, not by yanking with your biceps. Think “elbow to hip” on pulldowns.
- Neutral spine on rows – Hinge at the hips, chest proud, no rounding. If your lower back rounds, reduce the load or switch to a chest-supported row.
- Elbow path on face pulls – Pull the rope toward your face with elbows high (like a double biceps pose). Squeeze your rear delts at the top for two seconds.
- Grip variety – Use a neutral or underhand grip on hammer curls to shift stress patterns. Vary grips across the week to avoid overuse injuries.
Push Day B: Growth Focused Accessory Session

Push Day B shifts to higher rep ranges (8 to 20) and adds more isolation work to boost muscle growth. You’re still doing compound pressing (incline bench and seated dumbbell shoulder press), but the goal is controlled reps and a strong pump, not maximal weight. After the main lifts you’ll hit cable flyes for chest stretch, lateral raises for shoulder width, and an overhead triceps extension to finish the arms.
The higher rep work targets the upper chest and lateral delts, which are key for building a V-taper shape. Incline pressing emphasizes the clavicular head of the pec. Lateral raises add direct volume to the side delts, which don’t get as much work from pressing alone. This combination builds shoulder caps and upper chest thickness that make your torso look wider at the top.
Use slow, controlled eccentrics (three seconds down) on cable flyes and lateral raises to keep tension on the muscle. Don’t swing the weights or use momentum. Rest periods are shorter here (45 to 90 seconds) because you’re chasing metabolic stress and a pump, not pure strength. If your elbows hurt on overhead triceps extensions, switch to a rope pushdown or close-grip bench press. The exact exercise matters less than consistent tension and adding weight over the weeks.
Pull Day B: Width, Rowing Volume and Rear Delt Emphasis

Pull Day B is your width-building session. You’ll do two rowing variations (one barbell row and one machine or chest-supported row), plus a wide-grip lat pulldown to stretch the lats under load. Then you finish with high-rep rear delt flyes and an EZ-bar curl. This day stacks horizontal pulling volume to thicken your upper back and balances the pressing work from Push Day B.
Horizontal rows train scapular retraction and mid-back stability, which transfer directly to bench-press performance and shoulder health. Chest-supported rows remove lower-back fatigue so you can push rowing volume higher without risking form breakdown. Wide-grip pulldowns increase time under tension for the lats and improve mind-muscle connection. Rear delt work is critical because most people under-train the posterior shoulder, leading to rounded posture and shoulder pain.
Five coaching cues for Pull Day B:
- Barbell row setup – Hinge to roughly 45 degrees, pull the bar to your lower ribs, keep your core braced. If form breaks, drop the weight.
- Chest-supported row – Press your chest into the pad, retract your shoulder blades at the top, pause for one second. Don’t let your elbows drift behind your torso.
- Wide-grip pulldown – Use a grip slightly wider than shoulder-width, pull to your upper chest, control the eccentric. Don’t lean back more than 10 to 15 degrees.
- Rear delt flye – Bend forward at the hips or use an incline bench set to 45 degrees. Lead with your elbows, not your hands. Squeeze at the top.
- EZ-bar curl – Keep your elbows pinned at your sides. No swinging. Lower the bar slowly (three seconds) to get the most out of each rep.
Warm Up, Mobility, and Ramp Up Sets for Push/Pull Days

A proper warm-up protects your shoulders and lower back from injury, especially when you’re handling heavy loads on bench presses and barbell rows. Start with 5 to 10 minutes of light cardio (rowing machine, bike, or brisk walking) to raise your core temperature and get blood flowing. Then spend five minutes on dynamic mobility drills for the joints you’re about to load: arm circles, band pull-aparts, and scapular wall slides for push days; cat-cow stretches and dead hangs for pull days.
After general mobility, do 2 to 3 ramp sets for your first main lift. Ramp sets gradually load the movement pattern so your central nervous system is ready for working weight. For example, if your working weight on bench press is 185 pounds, you’d do one set at 95 pounds for 8 reps, one set at 135 pounds for 5 reps, and one set at 160 pounds for 2 reps. Then rest two minutes and start your first working set.
Four-step warm-up flow:
- General cardio (5 to 10 minutes) – Use any low-impact machine or jog lightly. Heart rate should climb but you shouldn’t break a sweat yet.
- Dynamic mobility (5 minutes) – Arm circles, band pull-aparts, bodyweight squats, hip openers. Move through ranges you’ll use in the workout.
- First ramp set (50% working load × 8 reps) – Focus on bar path and breathing. No fatigue yet.
- Second and third ramp sets (70% × 5, then 85% × 2) – Gradually increase load. Rest 60 to 90 seconds between ramp sets. After the final ramp, rest two full minutes before your first work set.
Progression Rules, Load Increases, and Rep Targets for This Routine

Progressive overload is the single most important driver of muscle growth and strength. Each week you should aim to do slightly more work than the week before, either by lifting more weight, completing more reps, or both. For upper-body lifts (bench, overhead press, rows), increase the load by 2.5 to 5% once you can hit the top end of the prescribed rep range for all sets. For lower-body movements (squats, deadlifts), jump 5 to 10% because legs adapt faster and can handle bigger load increases.
An alternative method is rep progression: stay at the same weight but add one or two reps per set each week until you hit the upper limit of the rep range. For example, if the program calls for 3 sets of 8 to 12 reps and you complete 3×8 this week, aim for 3×9 or 3×10 next week. Once you can do 3×12 with clean form, increase the weight by 5 pounds and drop back to 3×8. This approach is easier to track and reduces the risk of jumping weight too soon.
Four signs you’re ready to increase weight:
- You completed all prescribed sets and reps with one or two reps left in reserve (RPE 8).
- Your bar speed stayed consistent across all sets. No grinding or form breakdown.
- You’ve hit the top-end rep target (e.g., 12 reps) for two consecutive workouts.
- Recovery between sessions feels manageable and soreness is normal, not debilitating.
Use RPE (rate of perceived exertion) to control fatigue. An RPE of 7 means you could do three more reps; RPE 8 means two more; RPE 9 means one more. Aim for RPE 7 to 8 on most sets and push to RPE 9 on one or two top sets per lift. Leaving a rep or two in reserve protects joints, reduces injury risk, and lets you add volume week after week without burning out.
| Method | How It Works |
|---|---|
| Linear Load Progression | Increase weight by 2.5–5% (upper) or 5–10% (lower) once top-end reps are completed for all sets. |
| Rep Progression | Add 1–2 reps per set each week at the same weight until you hit the rep cap, then increase load. |
| RPE-Based Autoregulation | Adjust load session-to-session based on how hard sets feel (RPE 7–9). If RPE jumps to 10 early, reduce weight slightly. |
Volume Targets, Recovery Needs, and Deload Scheduling

Weekly training volume is measured in total hard sets per muscle group. For chest and back, aim for 12 to 18 sets per week; for shoulders, 9 to 15 sets; for biceps and triceps, 6 to 12 sets. This 4-day split naturally delivers those volumes because each muscle is trained twice. If you’re not gaining strength or size after four weeks, add one set per exercise or swap one isolation move for a second compound lift. If you’re constantly sore or performance drops, reduce volume by 10 to 20%.
Deload every 4 to 8 weeks to let your body catch up with accumulated fatigue. A deload week means cutting total volume by 40 to 60%, either by doing fewer sets (drop from 4 sets to 2) or by reducing weight and keeping reps easy (RPE 5 to 6). Some people prefer to keep the weight the same but cut sets in half. Either method works as long as you’re not pushing hard. One deload week resets recovery, protects joints, and sets you up for another 4 to 8 weeks of progressive overload.
| Muscle Group | Weekly Sets | Notes |
|---|---|---|
| Chest / Back | 12–18 | Split evenly across two sessions. If lagging, add one set per day. |
| Shoulders | 9–15 | Front/side delts get direct work on push days; rear delts on pull days. |
| Biceps / Triceps | 6–12 | Direct arm work plus indirect volume from rows and presses. Add sets if arms are a priority. |
Sleep 7 to 9 hours per night to support muscle repair and central nervous system recovery. Protein intake should hit 0.7 to 1.0 grams per pound of bodyweight daily (about 140 to 200 grams for a 200-pound lifter). Track your performance in a simple notebook or app. If your numbers stall for two weeks straight, check sleep, calories, and stress before adding more sets.
Common Form Mistakes and Simple Exercise Substitutions

On push days, the biggest mistake is letting your elbows flare too wide on bench press. Keep them at roughly 45 degrees from your torso to protect the shoulder joint and keep tension on the chest. Another error is losing your arch during the press. Your shoulder blades should stay pulled together and your feet planted on the floor throughout every rep. If your lower back hyperextends on overhead press, brace your abs harder and squeeze your glutes to stabilize your pelvis.
On pull days, rounding your lower back during barbell rows is the most common form breakdown. If you can’t maintain a neutral spine, reduce the weight or switch to a chest-supported row variation. Another issue is shrugging your traps during rows instead of retracting your shoulder blades. Think “squeeze a pencil between your shoulder blades” at the top of every row. On pull-ups and pulldowns, avoid swinging or using momentum. If you can’t control the descent, lower the weight or use an assisted pull-up machine.
If you don’t have access to a barbell, substitute dumbbell presses and rows. Dumbbells allow a more natural range of motion and can reduce shoulder strain. If cable machines aren’t available, use resistance bands for flyes, pushdowns, and face pulls. Bands provide constant tension and work well for high-rep isolation sets. If you have lower-back issues, replace barbell rows with machine rows (chest-supported, seated cable, or T-bar with chest support) to remove spinal loading while keeping rowing volume high.
Beginner, Intermediate, and Time Efficient Variations of the 4-Day Push/Pull Routine
If you’re new to lifting, start with 3 sets of 8 to 12 reps on every exercise and use lighter loads. Focus on learning proper form before chasing heavy weight. A beginner-friendly version of this routine would include 4 to 5 exercises per session instead of 6 to 8, cutting one or two isolation moves. For example, on Push Day A you’d do bench press, overhead press, incline dumbbell press, and one triceps move. Skip the lateral raises until you’ve built a base. Run this simplified version for 8 to 12 weeks before adding accessory volume.
Intermediate lifters can handle the full program as written. If you want faster sessions, use antagonist supersets: pair a push exercise with a pull exercise and alternate sets with minimal rest. For example, do one set of bench press, rest 60 seconds, do one set of barbell rows, rest 60 seconds, repeat. This cuts total session time by 15 to 20 minutes without sacrificing volume. Just make sure performance on the main lift doesn’t drop. If your bench numbers fall when you superset, go back to straight sets.
Three common variations:
- Beginner (lower volume, skill focus): 3 sets per exercise, 8 to 12 reps, 4 to 5 exercises per session. Prioritize compound lifts and perfect form.
- Intermediate (standard program): 3 to 5 sets per exercise, mixed rep ranges (6 to 20), 5 to 8 exercises per session. Add progressive overload weekly.
- Minimal equipment (dumbbell-only or bands): Replace all barbell work with dumbbell or band equivalents. Use single-arm rows, dumbbell bench, resistance-band flyes, and band pull-aparts.
Nutrition, Recovery Habits, and Supportive Lifestyle Tips for Better Results
Protein is the most important macronutrient for muscle growth. Aim for 0.7 to 1.0 grams per pound of bodyweight daily, spread across three to five meals. A 180-pound lifter needs roughly 125 to 180 grams of protein per day. Good sources include chicken, lean beef, fish, eggs, Greek yogurt, and whey protein powder. Carbs fuel your workouts and support recovery. Eat most of your carbs around training (one to two hours before and within two hours after). Fats support hormone production; include sources like olive oil, nuts, and fatty fish.
If your goal is muscle gain, eat in a slight calorie surplus (200 to 300 calories above maintenance). Expect to gain roughly 0.5 to 1.0 pounds per week if you’re in your first few years of training. If you’re cutting fat, eat in a 300 to 500 calorie deficit and prioritize protein to preserve muscle. Training four days per week in a deficit is manageable as long as you don’t add extra cardio or drop calories too low. Track your bodyweight weekly and adjust calories based on the scale trend.
Four key recovery and lifestyle habits:
- Hydration – Drink at least half your bodyweight in ounces of water daily (example: 180 lb = 90 oz). Add 16 to 24 oz during and after workouts.
- Sleep consistency – Go to bed and wake up at the same time daily. Aim for 7 to 9 hours. Poor sleep kills recovery and strength gains.
- Meal timing – Eat a meal with 25 to 40 grams of protein within two hours post-workout. Pre-workout, have a small carb plus protein snack 60 to 90 minutes before lifting.
- Light cardio for recovery – Add 10 to 20 minutes of walking or easy cycling on rest days to improve blood flow and reduce soreness. Don’t turn recovery cardio into another hard session.
Final Words
Jump in: follow the weekly layout, Push A (Mon), Pull A (Tue), Push B (Thu), Pull B (Fri). Do heavy compounds first, then accessory work; aim for 60-90 minute sessions with a 10-15 minute warm-up.
Use ramp sets, track reps, and add small load increases when you hit top-end reps. Keep weekly volume in the target ranges and plan a deload every 4-8 weeks.
Pick the version that fits your time and gear. Log one clear next step this week — follow the sample week and add a small weight or rep. You’ve got a compact, workable 4 day push/pull workout routine.
FAQ
Q: Is a 4 day push/pull split good and what is a good 4-day workout schedule?
A: A 4-day push/pull split is effective; a solid schedule is Push A (Mon), Pull A (Tue), rest, Push B (Thu), Pull B (Fri), training each muscle twice weekly with 60–90 minute sessions.
Q: How much exercise should a diabetic get a day?
A: A person with diabetes should aim for about 30 minutes of moderate aerobic activity most days, plus 2–3 weekly strength sessions; monitor blood sugar and check with your healthcare provider.
Q: What is the 3-3-3 rule for working out?
A: The 3-3-3 rule for working out commonly means doing three sets of three reps for heavy compound lifts, prioritizing strength with low reps, progressive overload, and full recovery between sets.